
Shipments Widget
Shipment Widget
Once you add this widget it will appear as shown below.
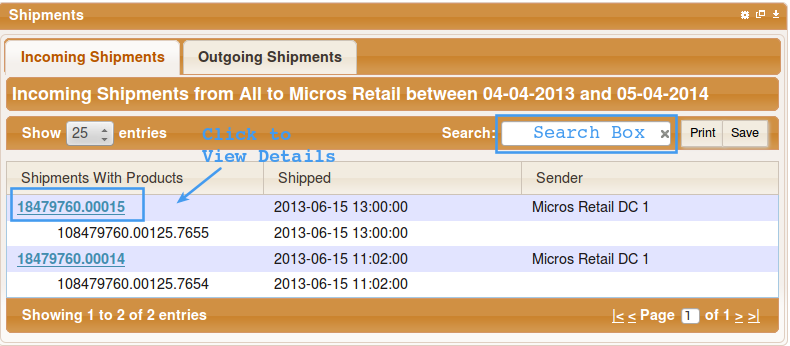
Configuration
The widget will use the current month as the period to view shipments from by default. To change this, click on the gear icon at the top right corner of the widget and you will presented with a form like the one shown below.
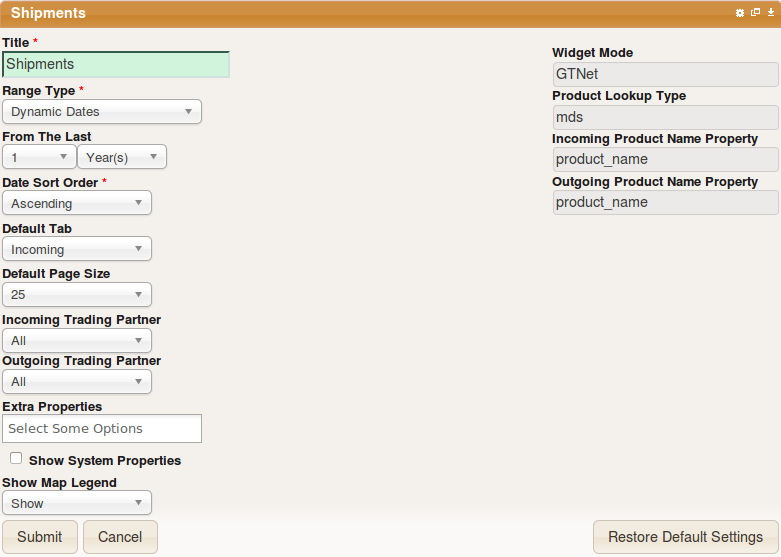
Widget Configuration
Option | Description |
|---|---|
Title | The name you would wish to call this widget |
Range Type | Allows you to select one of the following date types.
|
Date From / Date To | The date range from which you would wish view shipments |
*From Location | The source location of the shipments, it is normally a GLN (Global Location Name) |
*To Location | The destination of the shipments, it is normally a GLN |
Trading Partner (For DSB organizations only) | This option allows you to filter the shipments and products based on an organization that you have sent to or received from any shipments. |
Incoming Trading Partner | This option allows you to filter the incoming shipments and products based on an organization that you have received shipments from. |
Outgoing Trading Partner | This option allows you to filter the outgoing shipments and products based on an organization that you have sent shipments to. |
Default Tab | The tab you would wish to be selected each time the widget is loaded. This can be the incoming or outgoing shipments tab ( The default is the incoming tab). |
Default Page Size | The number of shipments you want displayed each time the widget is loaded. |
*Shipping Business Step | The business step that is used when dispatching the shipment, the default is urn:epcglobal:bizstep:shipping |
*Receiving Business Step | The business step that is used when receiving the shipment, the default is urn:epcglobal:bizstep:receiving |
Extra Properties | Extra columns that you may want to add to the widget. |
( * ) Denotes options that are only available when the widget is on EPCIS mode.
The options shown on the right side of the widget configuration form can only be changed by the administrator and users are only allowed to view them.
User's belonging to DSB organizations will always have one trading partner.
Once you have completed the form, click on submit to retrieve the shipments, which will be displayed as shown below.
Note
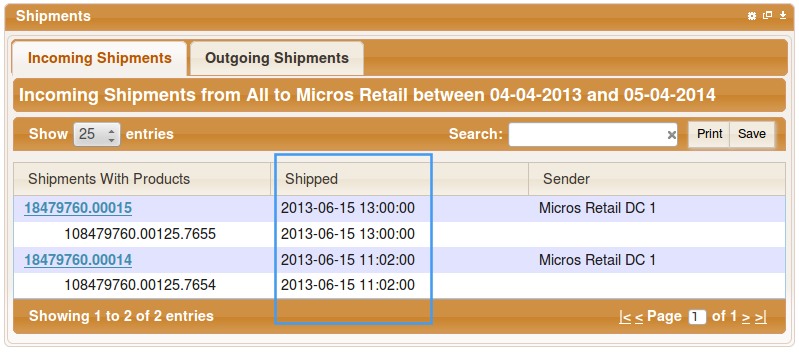
All dates in the widget, for example, the Shipped column (shown below) display the date in the date format that has been set in User Preference
- Use the Restore Default Settings button to restore default widget settings
Adding Extra Colums to the widget. Navigate to Widget Configuration.
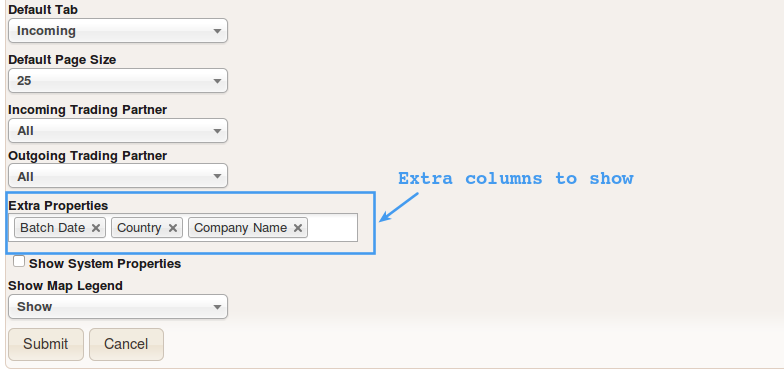
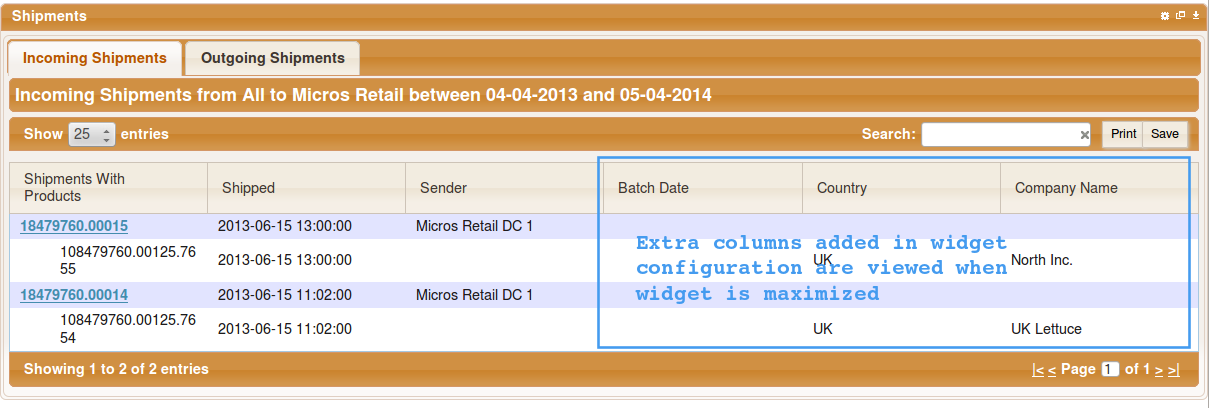
To view the extra columns you have added, maximize the widget, as shown below.
Details Tab
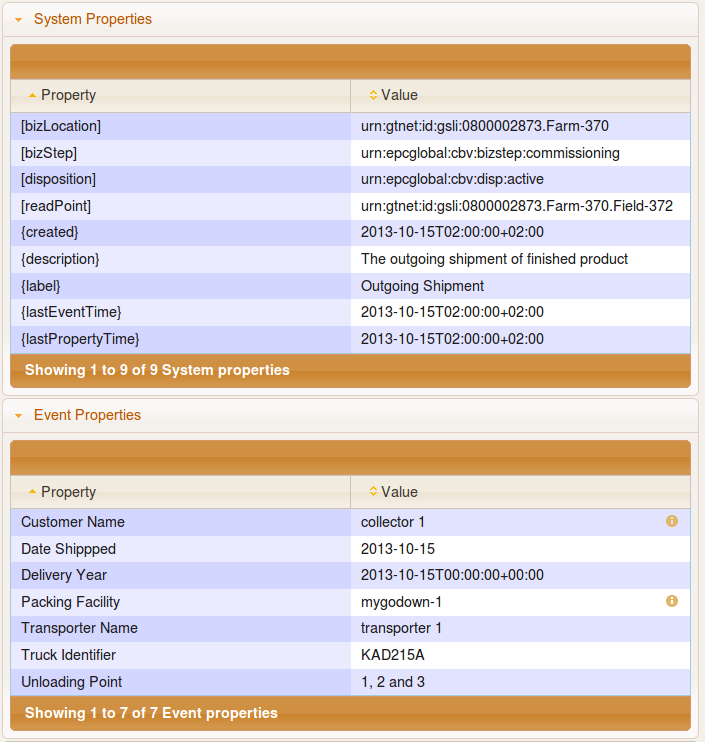
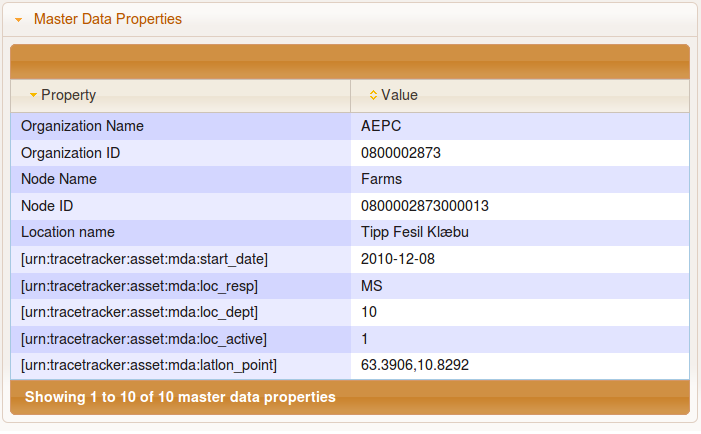
To view details such as the graph, properties, transformations and events belonging to a shipment or product, click on the EPC and details will be displayed as shown below. The "Label" attributes as defined in the TRD are what are displayed as the "Property" values instead of the actual id(s)/short names.
The details section is divided to 3 sections System properties (TRD meta data), Event properties and Master Data attributes
Note
The properties in curly braces {} and square brackets [] are only displayed if the property show system properties is enabled in the widget settings
Note
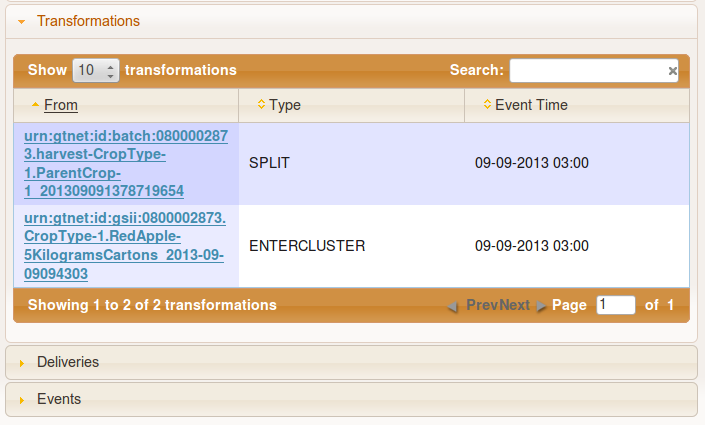
The tables Transformations, Deliveries, Events which appear just below Details are expandable and collapsible. When you expand or collapse them, the open-closed state of each panel is saved on the dashboard. That way, when you switch between shipment you see the same panels open or closed based on your last selection.
Note
The More Information button is only displayed when the target URL property has been defined in the master data service for the organization configuration
By Default, all panels are closed.

See below: Transformations Panel Open.
Graph Interaction
For more details on graph interaction see Object Navigator Widget