
New Project
Menu Admin → Manage project → Add project project brings you to a page, where you can set up a new project. Here you can set up project name, unique identifier, type (Project / Main Storage), location, boundary, contact person and starting date.
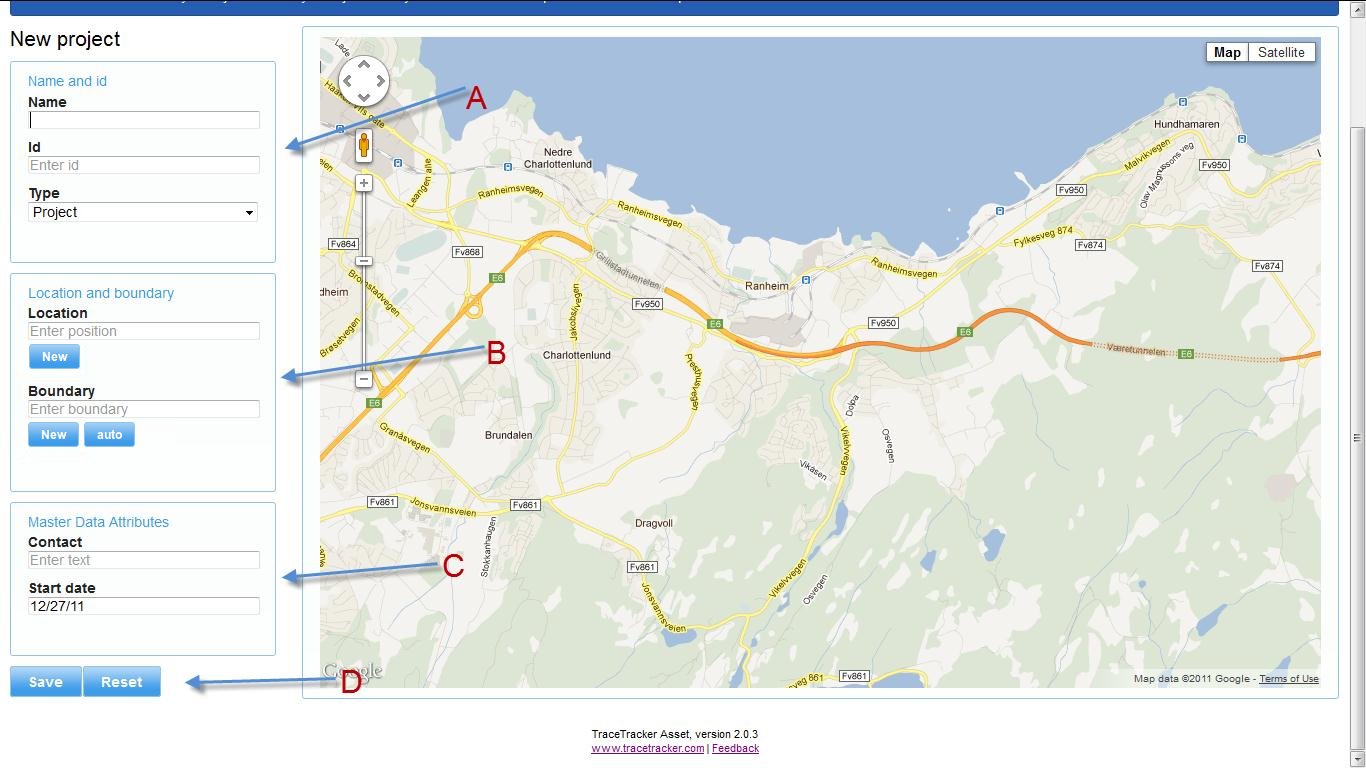
This is where a new project is created.
a. “A” is where the name, the id and type of the project is specified.
b. “B” Is where the location and boundary of the project is specified. Where the project will be located.
c. “C” specifies the master data attributes, the contact person and start date.
b. “B” Is where the location and boundary of the project is specified. Where the project will be located.
c. “C” specifies the master data attributes, the contact person and start date.
- Type “Project” — is supposed to be used for projects where some e.g. construction is happening.
- Type “Main Storage” — in contrary to projects, main storage is supposed to be place where the tools and containers are only stored but not used — e.g. warehouse.
- Location — GPS coordinates of the place, where the project is. It is a single point and at that place, the icon of the project with its details will be shown on the map. Recommended usage is to click “Edit” button, click on the map to place the icon and click “Confirm”. That will fill in the coordinates.
- Boundary — GPS coordinates of boundary of the area where the project is. It will be used to distinguish whether assets are at specific project. Click “Edit”, then several places on the map, defining a polygon, then “Confirm”.
Menu Admin → Manage project → Edit project edits the existing project. After selecting a project from a list, the options are the same as described above.