Creating a crop
Once you have logged in and the landing page is loaded (as shown below) you can begin the process of creating a crop by clicking on the create crop link.
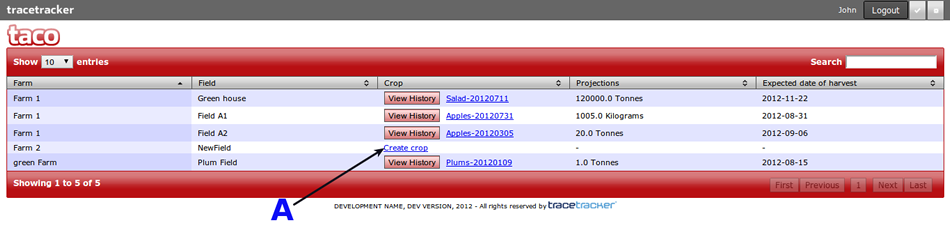
After selecting create crop, you will be presented with a form like one shown below
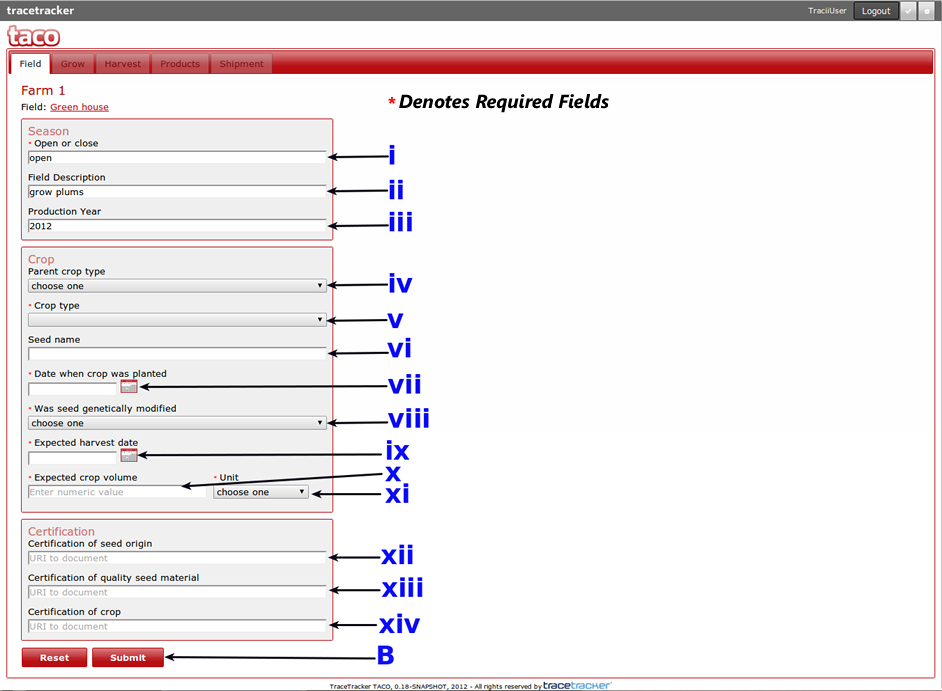
Below is a brief description of the information each field captures
Fields denoted with an asterisk ( * ) are required
i) Denotes that the season is open and is not editable
ii) A brief description of the field e.g Apples field 2 acres
iii) The year when planting was done on the field
iv) The name of the crop you are planting e.g if you are growing Granny Smith apples which are are variety of apples, you should select Apples as the parent crop
v) The variety of the crop you are planting e.g If you have selected plums as the parent crop then you can select cherry plums as the crop type.
vi) The name of the seed that you are growing
vii) Date when the crop was planted (it cannot be a date after the current date)
viii) Select whether the seed is genetically modified or not
ix) Date when you expect to harvest from the field (it cannot be a date earlier than the planting date)
x) Expected yield from the field
xi) The unit of measure of the expected yield e.g Kilograms, Pounds, Tonnes etc
xii) A URL to the certificate showing the seed origin
xiii) A URL to the certificate showing the quality of the seed
xiv) A URL to the certificate of the crop
Once you have filled all the required fields, click on Submit ( B ) to create the crop.
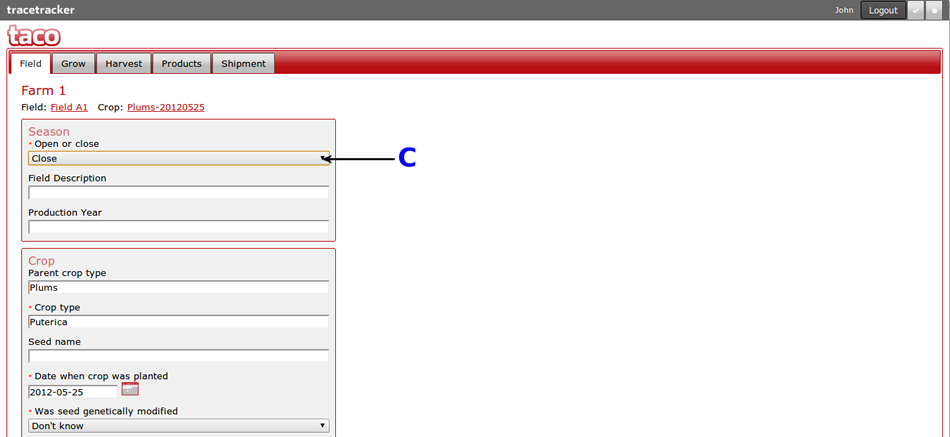
To end the season, click on the desired crop from the landing page, select close season ( as shown below ) then click submit.
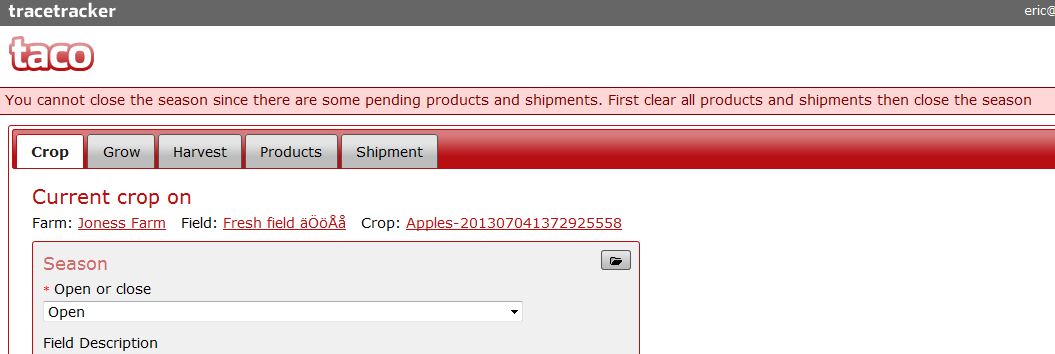
NOTE: You cannot close a season if there are any pending Products or Shipments for that season. You must first clear all the Products and Ship them, then head on to close the season. An attempt to close the season with pending products or shipments will result in the error as shown below and the season will not be closed: