
Interfacing with the companys TIX
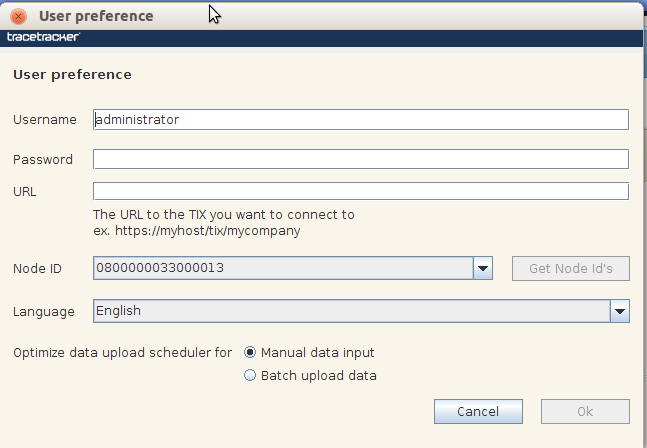
Login dialog shown when installing TT Data Uploader.
this figure shows the dialog box that appears after starting TT Data Uploader for the first time. Complete the login involves the following steps:
- Enter the user
- Enter the password for the user
- Enter the URL for the TIX
- Click Get Node Ids to retrieve the available traceability model from the TIX
- Select the target Node ID
- Select the language TT Data Uploader should use.
- Press Ok to complete the login and start working against the selected TIX/Node ID combination.
Changing Node ID
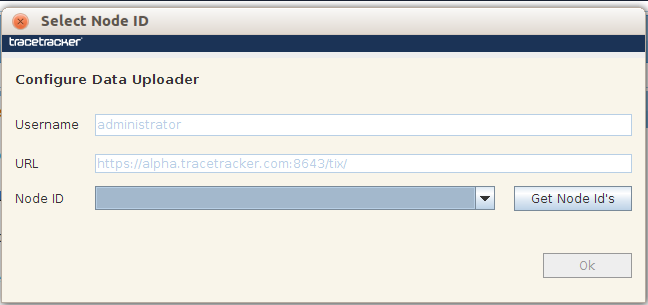
Dialog shown when configuring the Node ID
It is possible to have multiple Node IDs in the event (for example) that the company has multiple production lines. this figure shows the dialog for changing the TRD. Changing the TRD to use on a specific TIX involves the following steps:
- Click on Options under the menu (Tools → Options)
- Click Get Node IDs in the dialog shown
- Select the target Node ID
- Press Ok to complete
Changing TIX
Changing the TIX after the login is done through the web console. This involves the following steps:
- Pressing Open web console in the menu shown when right clicking TT Data Uploader system tray icon.
- Enter username and password in the login page (this figure).
- Pressing Suspend on the Dashboard to suspend the Data Uploader. (this figure)
- Pressing Configuration in the left navigation bar.
- Enter the new TIX URL in the Data repository: URL field (this figure).
- Update username and password if required.
- Pressing Save
- Pressing Dashboard in the left navigation bar.
- Pressing Resume to resume the Data Uploader. (this figure)
- TT Data Uploader will now show the dialog for configuring what Node ID (see this figure) to use in combination with the new TIX (see previous section on how to configure the Node ID).
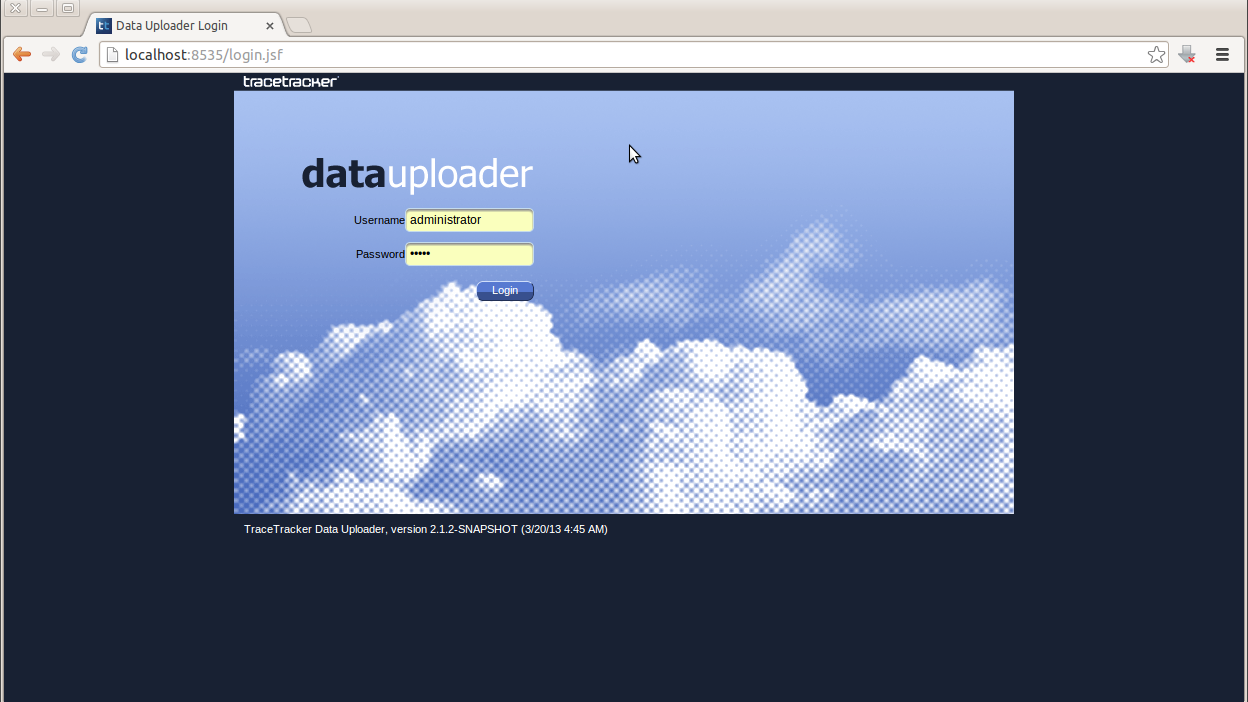
Login page for TT Data Uploader
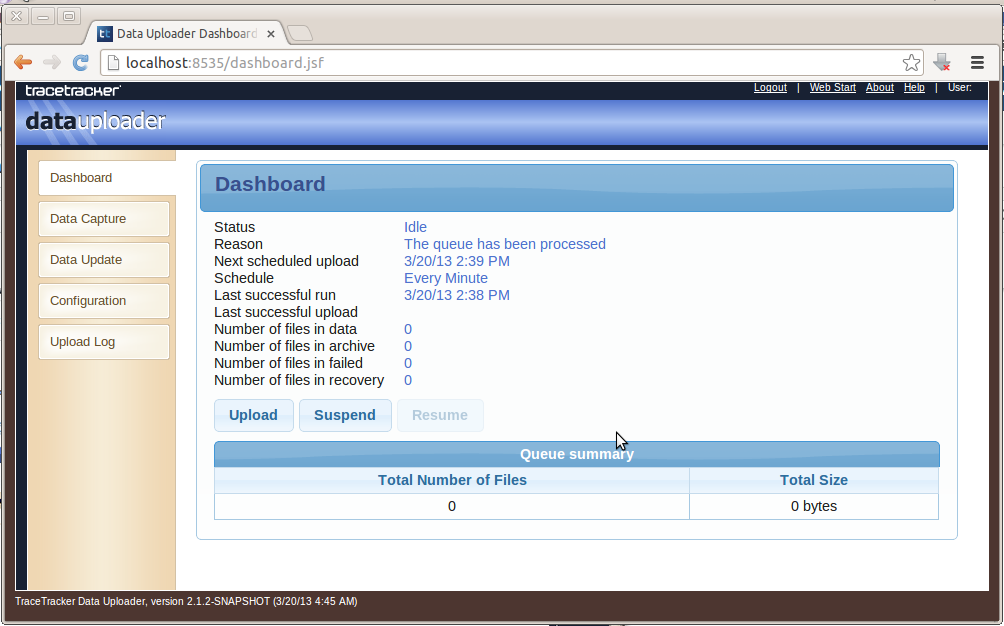
TT Data Uploader Dashboard page
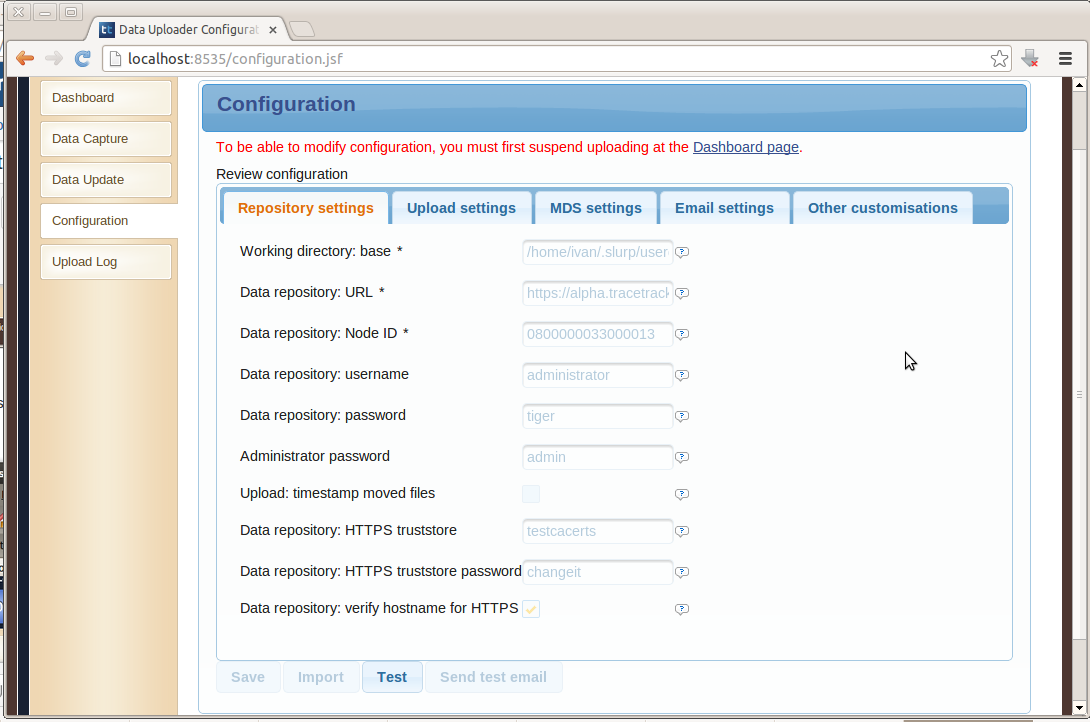
TT Data Uploader Configuration page.