
Asset Driver User Guide
Welcome to Asset Driver; an easy to use online drivers log book. Asset Driver allows you to manage all GPS driving events that have been automatically recorded and added to your company’s internal system. Asset Driver takes much of the pain out of updating your log book and generating reports.
A quick Tour of Asset Driver
The main page lets you:
- Filter trip log by time and labels
- Edit trip type
- Adding and removing labels from a trip
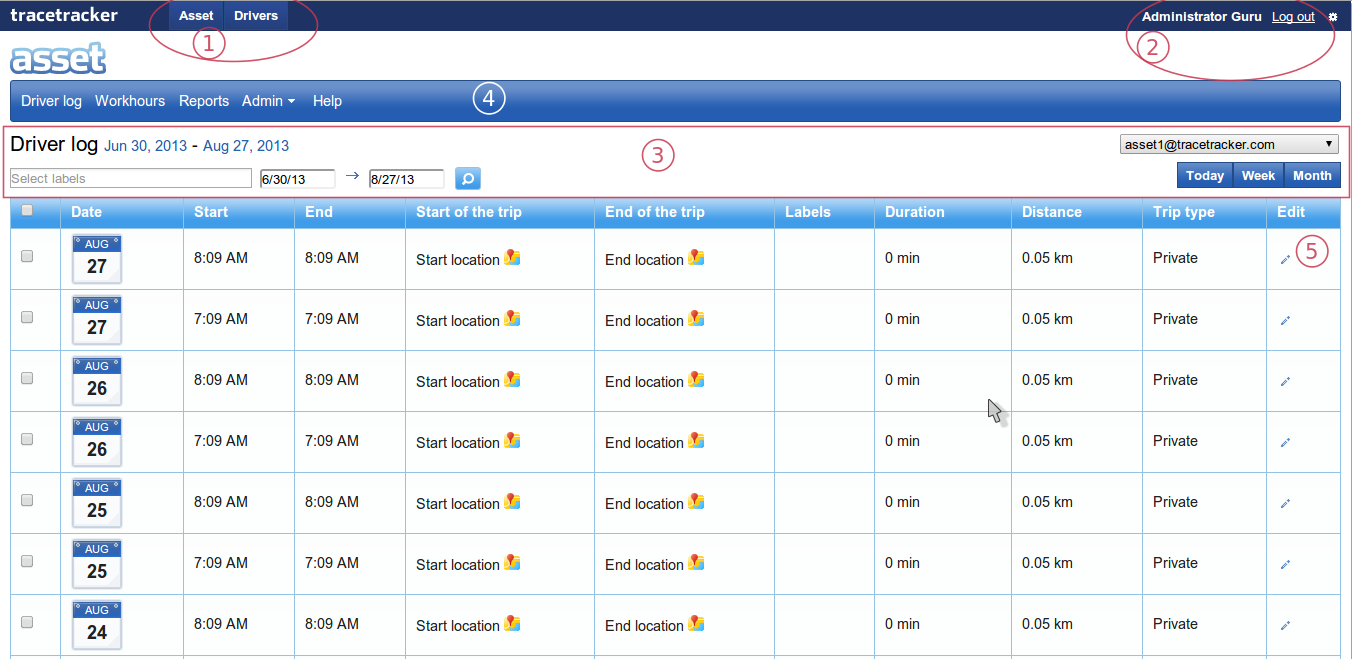
The major annotated parts above are:
- Top Navigation Switch between Asset and Driver's Log
- Current User
- Search Criteria and Filters for time periods
- Main Navigation Bar within Driver's Logbook application
- Actions that can be performed on a chosen trip. This includes editing trip type between private and work
Viewing trips

View trips by time period
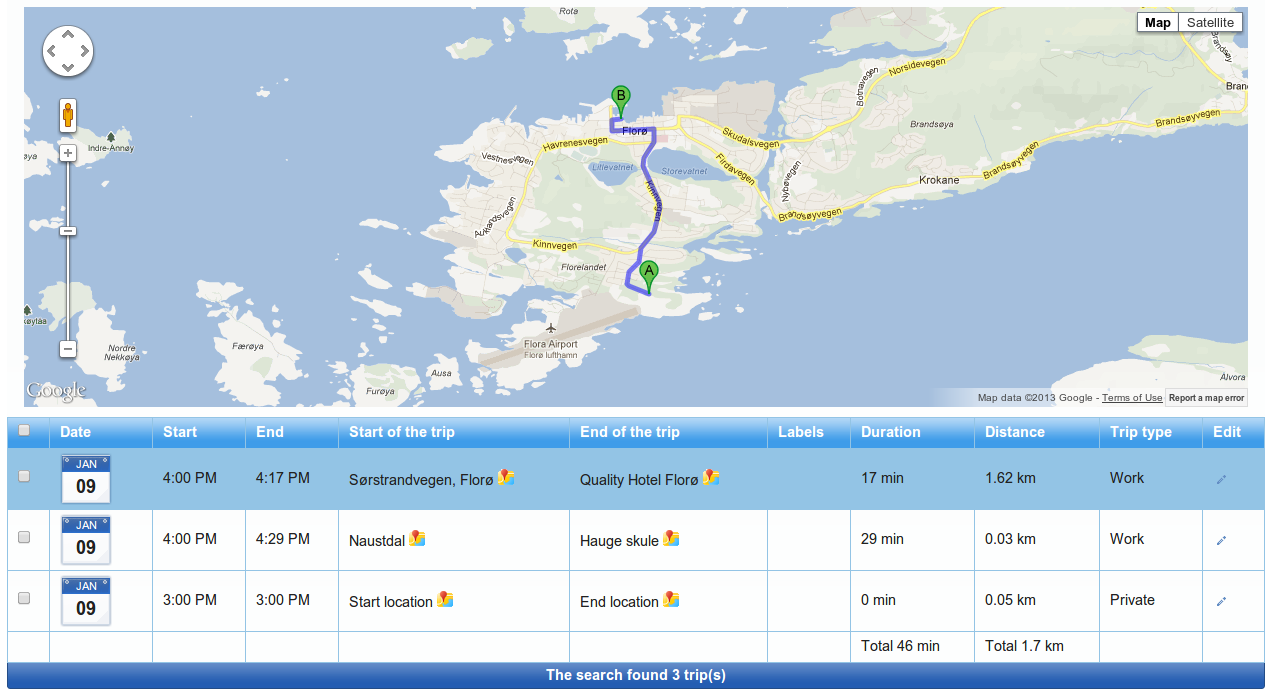
View trip route
The trip route will be shown in a map when clicking on the map icons display beside the name of the start and end address.
Labeling trips
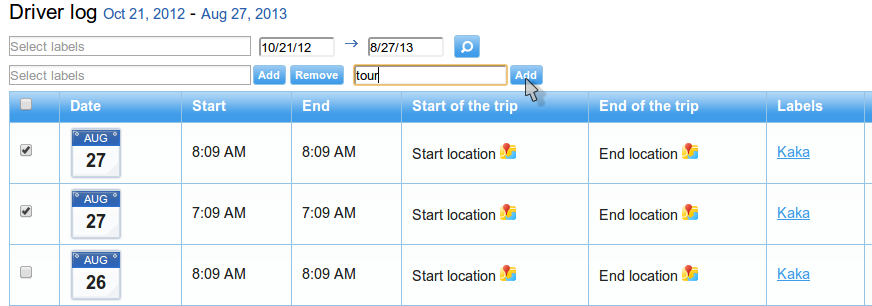
Labeling trips is a great way to organize various trips within the log book and have them linked to specific projects. The labeling functionality has enough flexibility to allow you to organize your trips in any shape that works best for you and your reporting.
Add labels to a trip
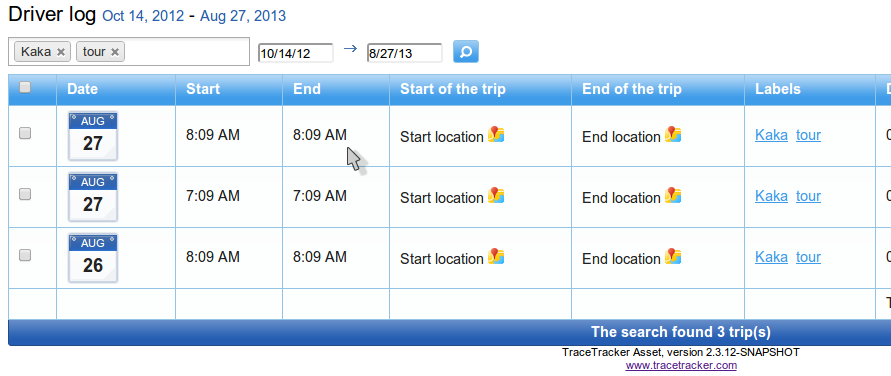
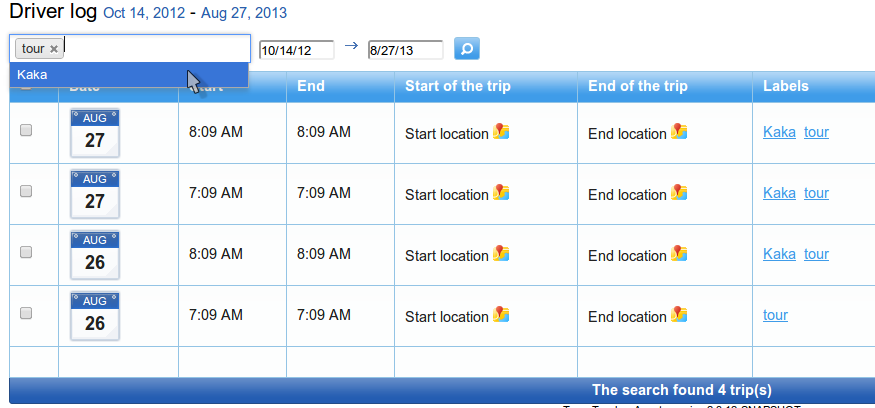
Filter trips on labels
Once you have created new labels that have been assigned, you can later filter on the labels that you have previously created and add them to other search sets or remove them.
Editing trips
Throughout the work day there may occur some trips that are unrelated to any work project and therefore not relevant to the driver’s log or driver’s report (Example: doctors appointment, family related errands etc.) These trips can be marked private by clicking on the edit icon in the far right column of the results table.
Click the edit icon and select either “Private” or “Work” to change the status of a trip.

Create future events or repeating events in the “Work Hours” form
There may be instances where you know of future trips that will need to be automatically marked private. An example of this would be vehicle usage after work hours or during holiday periods that may not be billable to any particular project. Clicking on the “Workhours” button in the main navigation will open a form where you can assign future events to be automatically marked “Private”.

Use the form to create a set of time periods to mark automatically. A table listing future events is listed below. You can easily remove future instances from the schedule list.
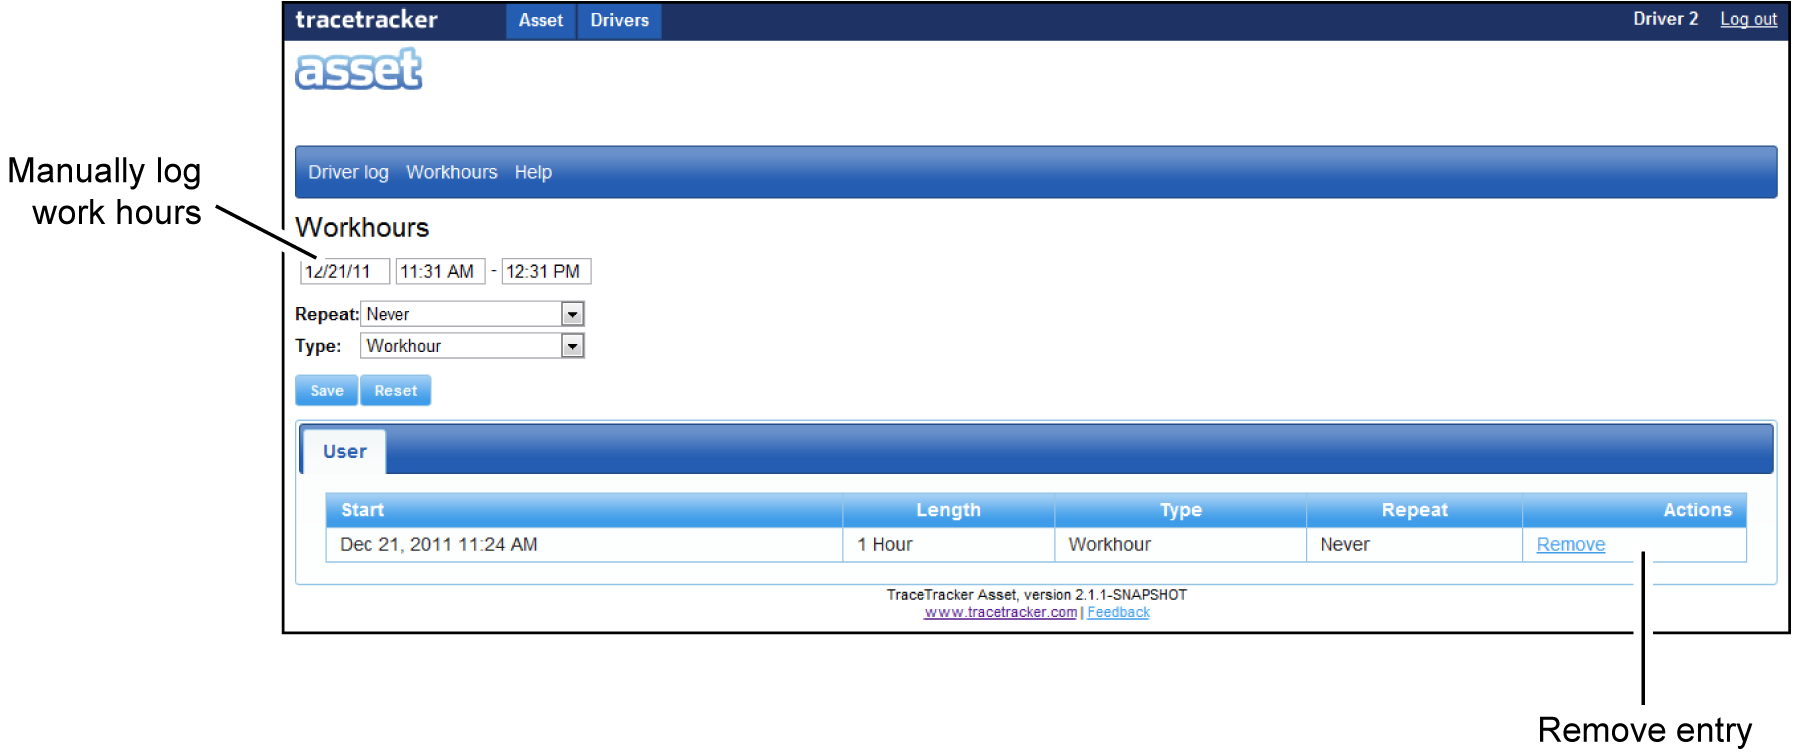
Add future event
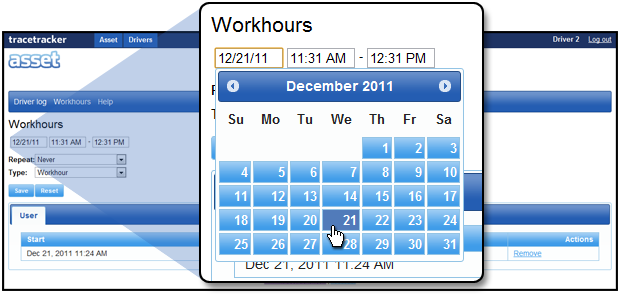
Select either a date or a range of dates to be marked.
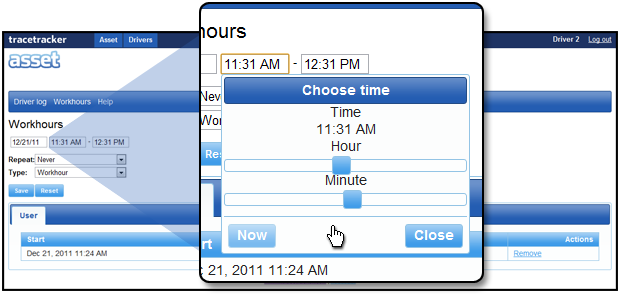
When you select to hours fields a slider appears allowing you to select a set of hours that will be applied to the range of dates you have selected.
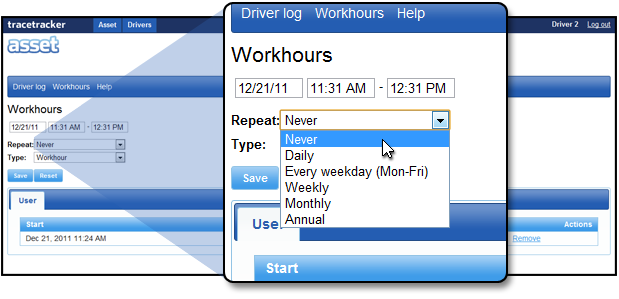
Select how often you want this event to repeat if this is a recurring
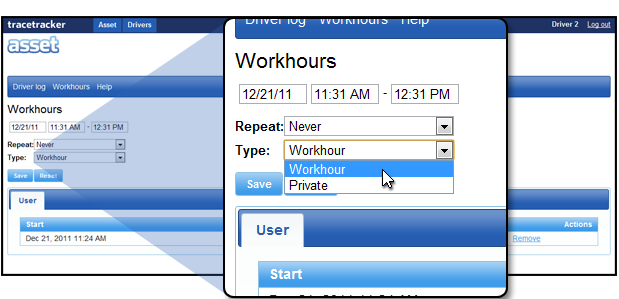
Once the time period or periods have been selected, choose which type you want to assign and finish by clicking save.
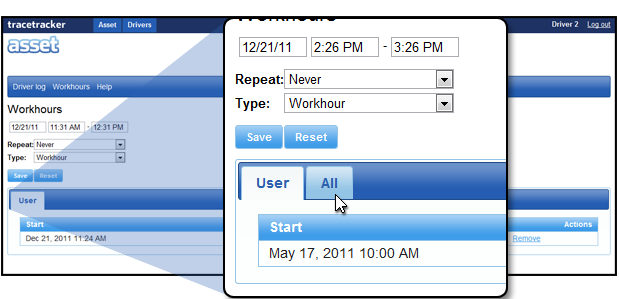
If you are logged in as an administrator, you can apply these parameters to all of the drivers within the database.
Administrator
An administrator can add new drivers to the system and manage the registered driver vehicle.
Add a driver
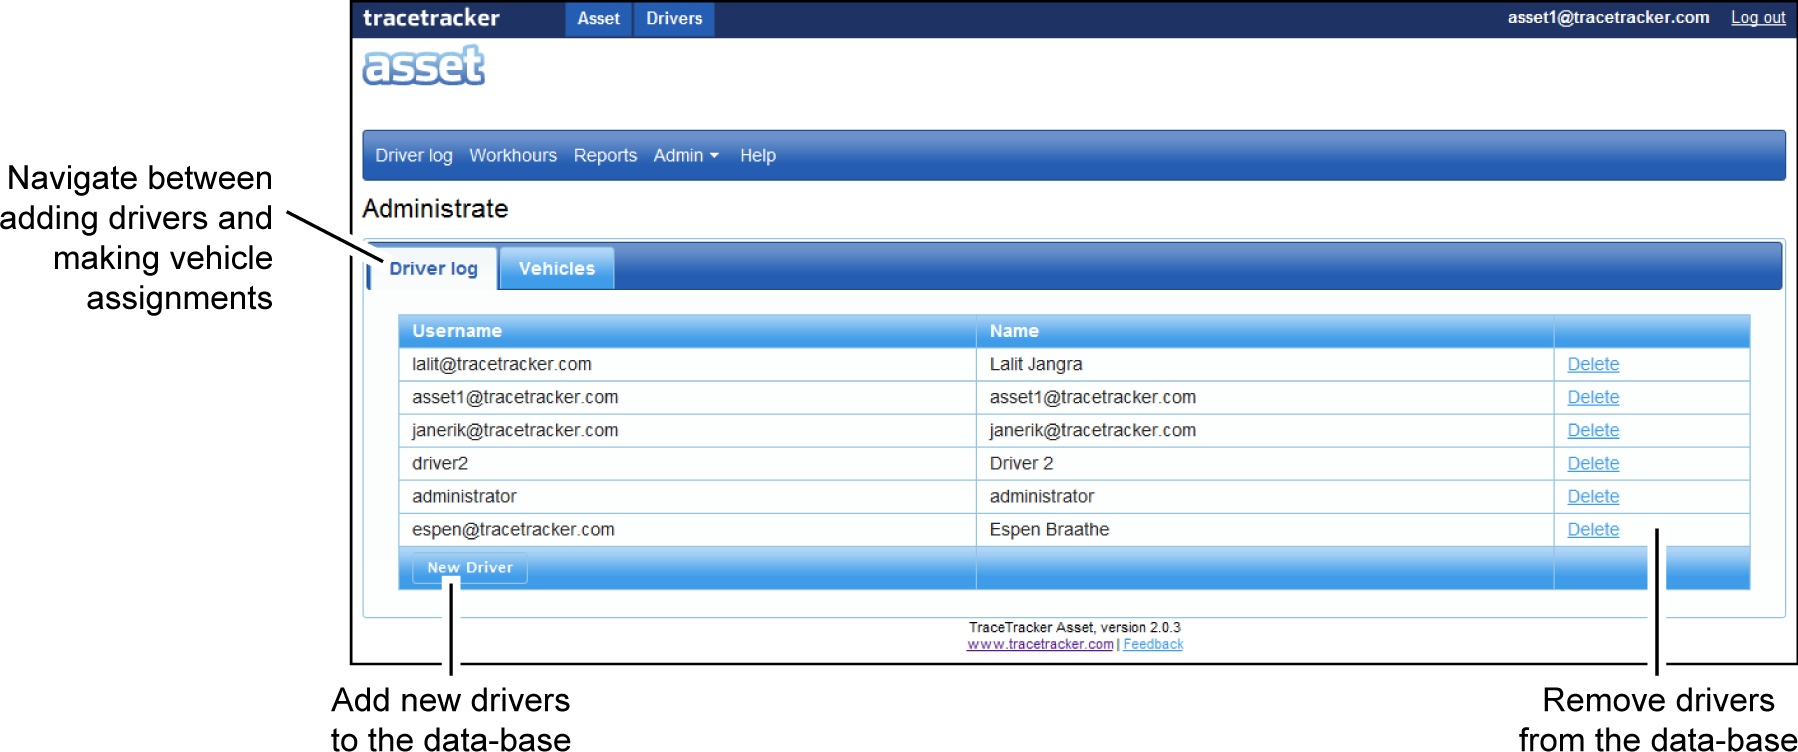
Select the "Drivers" menu option from the "Admin" drop menu in the main navigation. At the bottom of the list of drivers click on a button marked “New Driver”
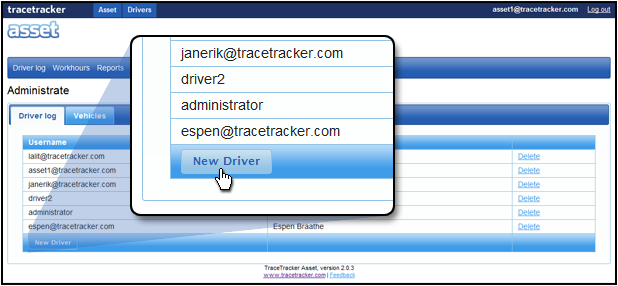
Select the name of the new driver as below and click the "Add" button

Remove a driver
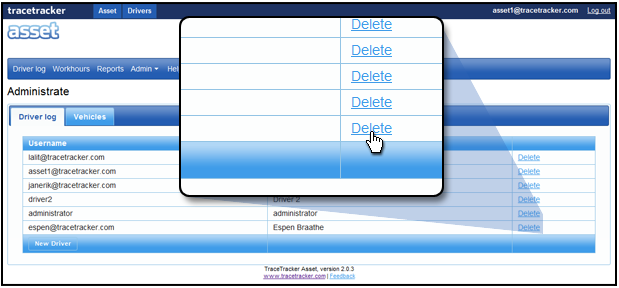
Click on the delete link in the far right column to remove a driver from the database.
Vehicle assignments
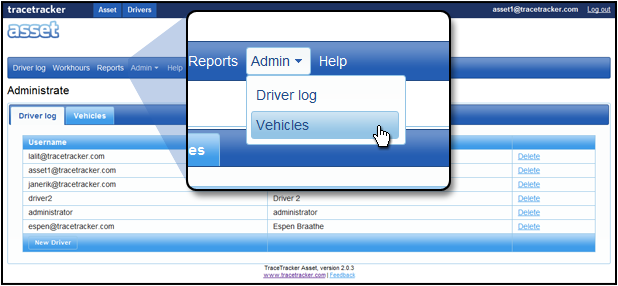
Select the “Vehicles” menu option from the “Admin” drop-down menu in the main navigation. A vehicle assignment is a relation between a vehicle and a driver where all vehicle trips will be logged to the assigned driver.
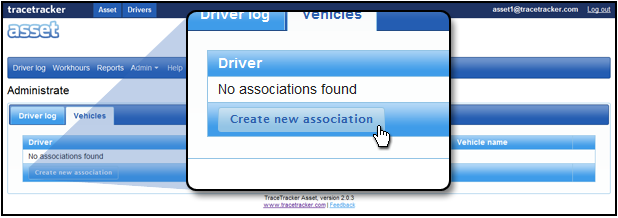
Create a new association by clicking the "Create new association" button at the bottom of the table
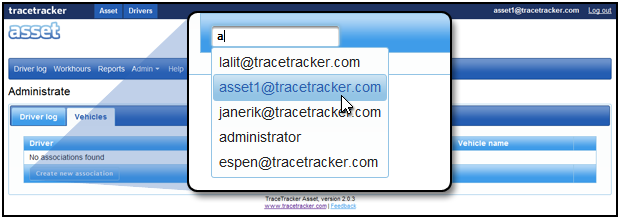
Begin keying in the name of the driver, as you type a list of suggested drivers that currently exist in the database will be listed in your selection
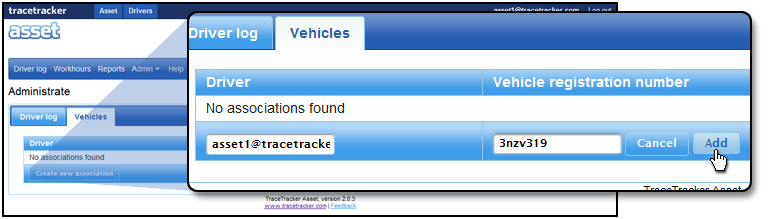
After selecting the driver, type in the vehicle and then click the "Add" button to create the assignment.
Finding out invalid associations
Sometimes, a user's roles may change and might lead to stale info regarding their validity as drivers. This is easily indicated by a red colored text in the row with wrong association.
A corrective action is to delete the association and link up the vehicle with a correct driver.
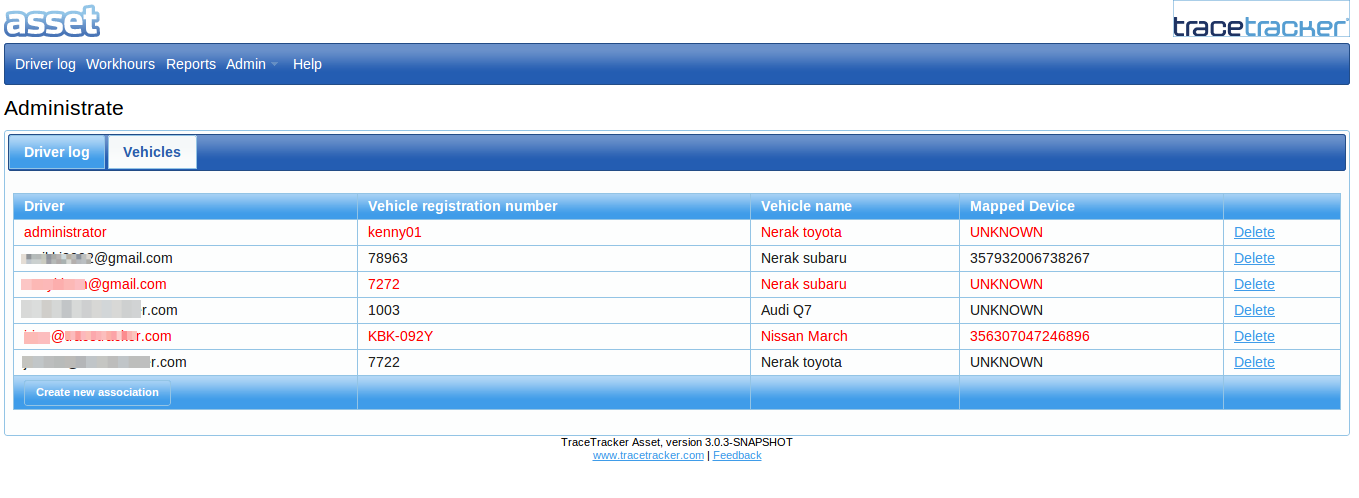
Invalid associations are red-colored to indicate invalid user roles e.g User does not qualify to be a Driver or May not exist.